Crochet Cotton Pad Dispenser Pattern (Free)
A free, beginner-friendly pattern that clearly guides you through the steps.
Published October 7, 2026 · by Emma
- Skill level
- Beginner
- Yarn weight
- Medium (4)
- Hook size
- 5.0 mm (H-8)
- Time
- about 3 hours
- Gauge
- 12 dc and 7 rows = 10 cm
- Yardage
- about 250 yards
- Sizes
- 15 × 10 cm (6 × 4 in)
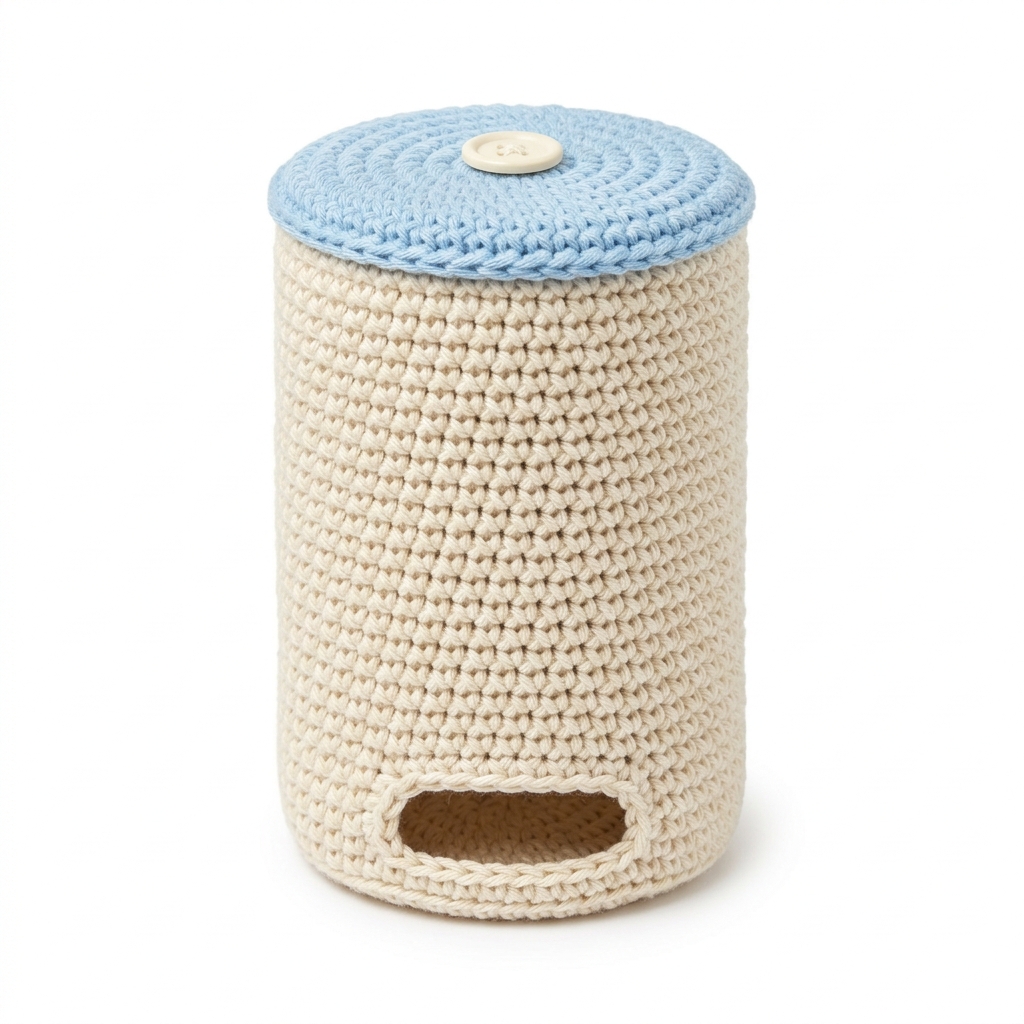
This crochet cotton pad dispenser pattern makes a practical and lovely addition to your bathroom or vanity. The Pad Tower offers a stylish way to store cotton pads, ensuring that they pull easily from the bottom. You’ll enjoy working through the straightforward stitches involved, and you might even find yourself making a few as gifts!
This project is perfect for beginners who are looking to build their skills. You’ll gain confidence in using basic crochet stitches while creating something useful for your space.
Why You'll Love This Pad Tower
- Functional design – it keeps cotton pads tidy and easily accessible.
- Quick to crochet – this project takes just a few hours to complete.
- Customizable colors – choose yarn shades that match your décor or personal style.
- Great gift idea – perfect for new homeowners or as a treat for yourself.
Is This Pattern Good for Beginners?
Yes! The Pad Tower is an easy project that allows you to practice essential crochet techniques, making it ideal for beginners.
Crochet Abbreviations (US Terms)
- ch – chain
- dc – double crochet
- sc – single crochet
- sl st – slip stitch
- st(s) – stitch(es)
- rnd – round
- sp – space
How to Check Your Gauge
- To check gauge, crochet a 4-inch (10 cm) square in double crochet and measure. If your gauge does not match, switch to a larger or smaller hook accordingly.
Size and Gauge
- Finished Size: Approximately 15 cm (6 in) tall and 10 cm (4 in) in diameter
- Gauge: 12 dc and 7 rows = 10 cm (4 in)
Step-by-Step Instructions
How to Crochet a Pad Tower (Step by Step)
Body
The body is worked in rounds, starting at the center.
- Foundation Round: Ch 4, join to form a ring. (1)
- Rnd 1: Ch 2 (counts as first dc), work 11 dc into the ring, join with sl st to top of ch 2. (12 dc)
- Rnd 2: Ch 2, 2 dc in each dc around, join with sl st. (24 dc)
- Rnd 3: Ch 2, dc in next dc, 2 dc in next dc, repeat from * to * around, join with sl st. (36 dc)
- Rnd 4: Ch 2, dc in next 2 dc, 2 dc in next dc, repeat from * to * around, join with sl st. (48 dc)
- Rnds 5–15: Ch 2, dc in each dc around, join with sl st. (48 dc for each rnd)
- Repeat for Rounds 5–15 (11 rounds total).
- Rnd 16: Ch 1, sc in each dc around, join with sl st. (48 sc)
- Rnd 17: Ch 1, sc in next 12 sc, ch 1, skip 12 sc, sc in next 12 sc, ch 1, skip 12 sc, join with sl st. (48 sc)
- Rnds 18–19: Ch 1, sc in each sc around, join with sl st. (48 sc)
Top
- Rnd 20: Ch 1, sc in each sc around, have the last sc join with sl st to start.
- Cut the yarn, leaving a long tail for sewing.
Finishing
- With tapestry needle, weave in all ends.
- Sew the button onto the center of the top, creating a decorative yet functional feature.
- Optionally fill the body lightly with fiberfill if a sturdier shape is desired.
Beginner Tips for a Great Pad Tower
- Use stitch markers to keep track of your rounds; it helps avoid mistakes.
- Take breaks to count your stitches regularly to ensure the right shape.
- Practice your tension by keeping your stitches consistent for a neater finish.
Common Mistakes (and How to Fix Them)
- "My stitches are too tight." – This can happen if you're crocheting too tightly. Try relaxing your grip on the yarn.
- "The shape looks off." – If the size doesn't match, check your gauge and adjust your hook size if needed.
- "I have gaps between my stitches." – Ensure you’re joining rounds carefully and pulling the slip stitch tightly.
How to Care for Your Pad Tower
Hand wash in cold water and lay flat to dry. Avoid wringing to maintain its shape, ensuring your cotton pad dispenser lasts a long time.
FAQ
Can I use a different yarn?
Yes, you can swap out the yarn for any medium-weight cotton yarn, but note that different fibers may change the look and drape.
How can I resize the dispenser?
To resize, adjust the number of rounds you crochet for the body. New rounds will follow the same increase pattern.
How long will this take to make?
Expect to spend around 3 hours, divided between making the body, top, and finishing touches.
Looking for more? Check out our cozy collection of home-decor patterns.
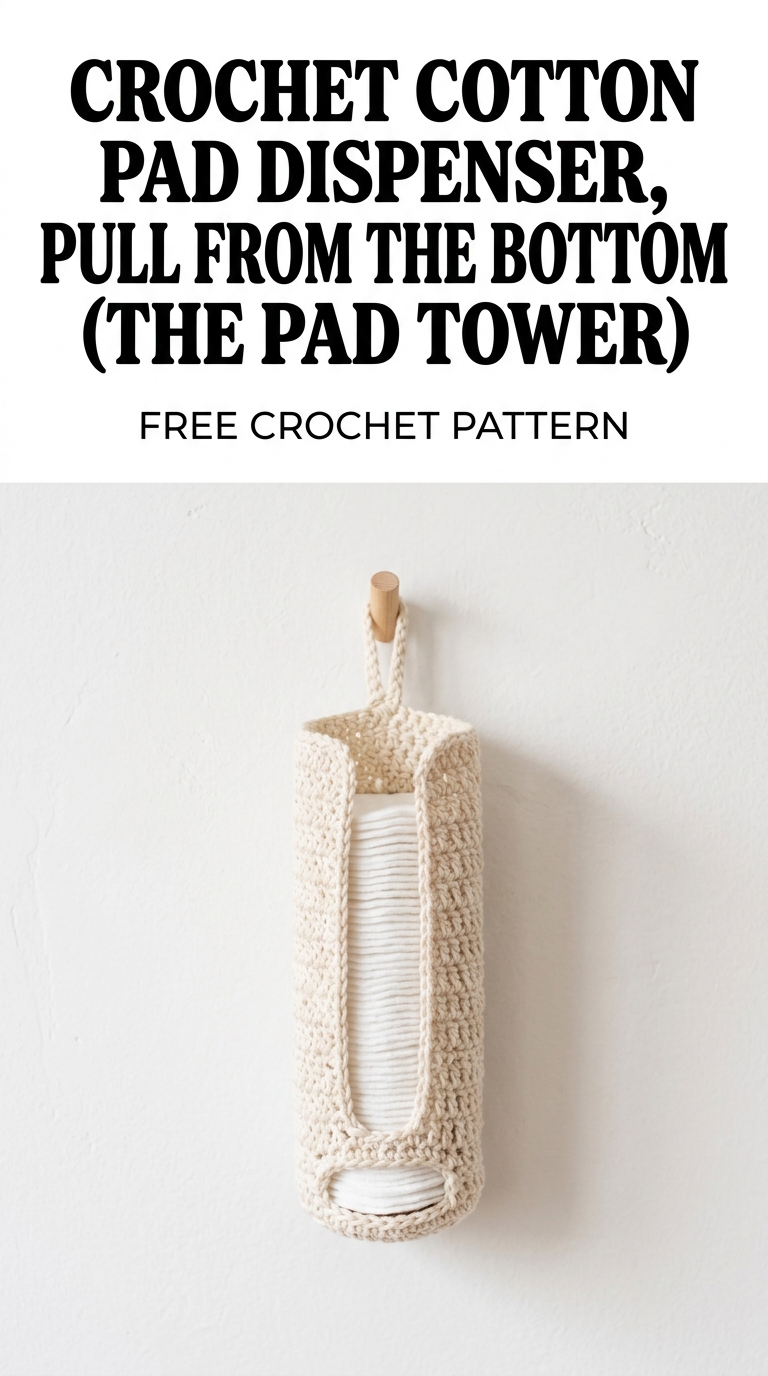
Image shown for inspiration — your finished result may vary slightly.