Crochet Lamp Base Organizer With Pockets Pattern (Free)
A free, beginner-friendly pattern that clearly guides you through the steps.
Published October 7, 2026 · by Emma
- Skill level
- Beginner
- Yarn weight
- Worsted (4)
- Hook size
- 5.5 mm (I-9)
- Time
- approximately 6.5 hours
- Gauge
- 12 dc and 7 rows = 4 in
- Yardage
- about 600 yards
- Sizes
- 14 in (35.5 cm) diameter, 12 in (30.5 cm) height
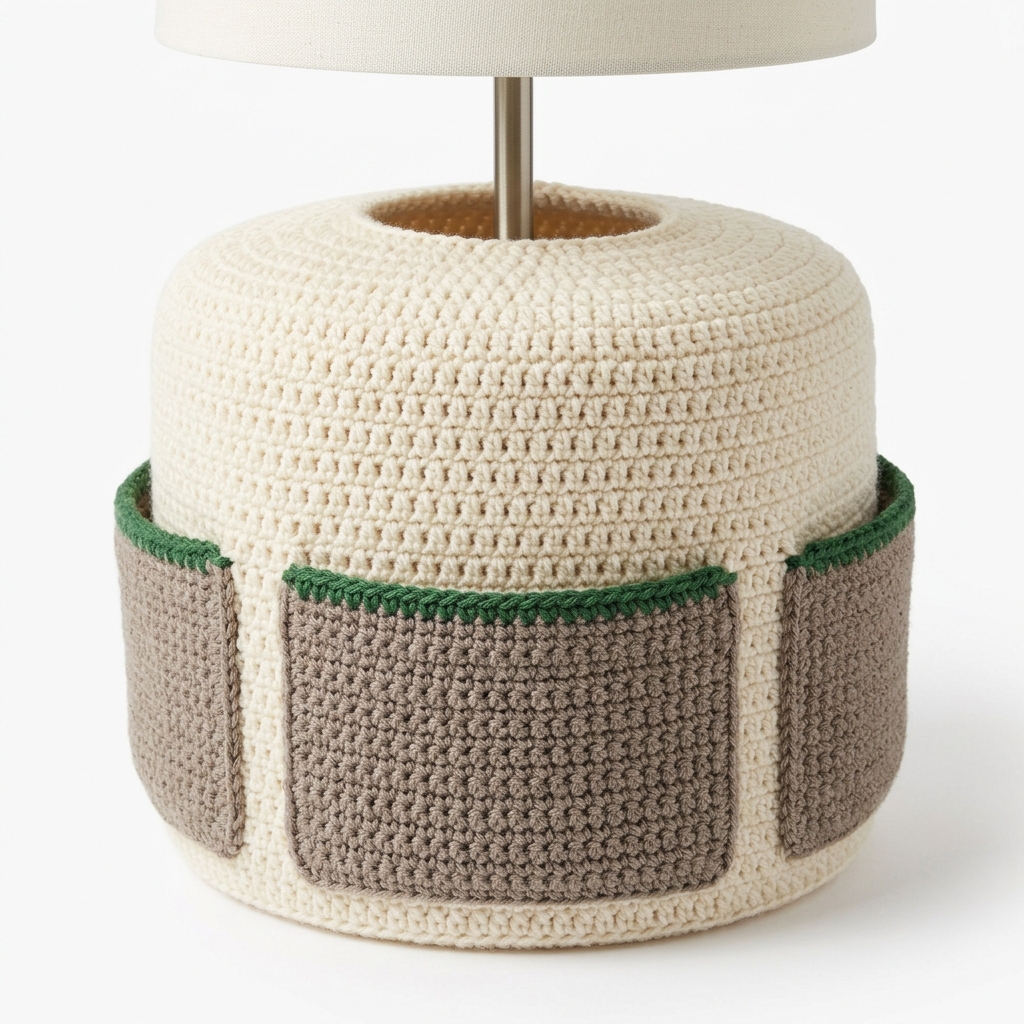
This crochet Lamp Base Organizer pattern makes a lovely and practical caddy that fits around your lamp's base. It's designed with pockets to neatly store remote controls, notepads, or pens, helping to keep your space organized while also adding a charming touch to your home decor. You’ll enjoy crafting this delightful organizer by using basic stitches and techniques.
This project is suitable for anyone looking to enhance their crochet skills, particularly those new to working in the round and creating pockets. You'll develop your understanding of gauge and learn different color changes.
Why You'll Love This Lamp Base Organizer
- Functional design – it perfectly holds your essentials while decorating your space.
- Easy to follow – the step-by-step instructions ensure you can successfully create this project.
- Customizable – feel free to experiment with colors and yarn types to match your decor.
- Great for practice – you’ll improve your double crochet skills while making something useful.
Is This Pattern Good for Beginners?
Yes! This pattern uses basic stitches and techniques, making it ideal for beginners. You'll practice working in the round and creating pockets, which are both helpful skills to have.
Crochet Abbreviations (US Terms)
- ch – chain
- sc – single crochet
- dc – double crochet
- sl st – slip stitch
- sk – skip
- st – stitch
Size and Gauge
- Finished size: 14 in (35.5 cm) diameter at the top, 12 in (30.5 cm) height
- Gauge: 12 dc and 7 rows = 4 in (10 cm) in double crochet
To check your gauge, make a swatch of 20 dc by 12 rows. Adjust your hook size if your gauge doesn't match.
How to Crochet a Lamp Base Organizer (Step by Step)
Part 1: Base Round
The base is worked in rounds, starting at the center.
- With Color A, ch 5, join with sl st to form a ring.
- Round 1: Ch 3 (counts as dc), 11 dc in the ring. Join with sl st to top of beginning ch (12 dc).
- Round 2: Ch 3, 1 dc in the same st, 2 dc in each st around. Join (24 dc).
- Round 3: Ch 3, 1 dc in the same st, *1 dc in next st, 2 dc in next st; repeat from * around. Join (36 dc).
- Round 4: Ch 3, 1 dc in the same st, *1 dc in next 2 st, 2 dc in next st; repeat from * around. Join (48 dc).
- Round 5: Ch 3, 1 dc in the same st, *1 dc in next 3 st, 2 dc in next st; repeat from * around. Join (60 dc).
- Round 6: Ch 3, 1 dc in the same st, *1 dc in next 4 st, 2 dc in next st; repeat from * around. Join (72 dc).
Part 2: Body
The body consists of repeated rounds of double crochet.
8. Round 7: Ch 3, dc in each st around. Join (72 dc). Repeat this row for 8 more rounds, for a total of 9 rounds (Rounds 7–15, 72 dc each).
9. Round 16: Ch 1, sc in each st around. Join (72 sc).
Part 3: Pockets
We’ll form the pockets at this stage by creating chains that will later be filled.
10. Round 17: With Color B, ch 1, sc in next 14 st, ch 10 (to form pocket), sk 10, sc in next 14 st, ch 10, sk 10, sc in next 14 st, ch 10, sk 10, sc in last 14 st. Join (72 sc with 3 ch 10 spaces).
11. Round 18: Sc in each st until the ch 10, sc in the first ch, sc in last ch, sc in next st; repeat for each pocket. Join (72 sc).
12. Round 19: Change to Color C, sc in each st around. Join (72 sc).
13. Rounds 20–22: Repeat Round 18 to create a total of 3 rows for pockets (72 sc each).
Part 4: Finishing
Let’s wrap things up by fastening off and weaving in our ends.
14. Fasten off all yarn and weave in ends. Block if necessary to smooth out the edges.
Beginner Tips for a Great Lamp Base Organizer
- Use stitch markers to keep track of your rounds; this helps avoid losing your place.
- Check your gauge before starting; it’s important for the size of your finished organizer.
- Don’t hesitate to undo your stitches if something doesn’t look right; practice makes perfect!
Common Mistakes (and How to Fix Them)
- My stitches are too tight. – This often happens when you’re new. Try using a hook one size larger to loosen tension.
- The shape looks off. – You may have skipped rounds or not followed the stitch counts. Count your stitches regularly.
- My pockets are uneven. – It can be tricky to keep them aligned. Mark the starting point for each pocket as you work.
How to Care for Your Lamp Base Organizer
To keep your lamp caddy in great shape, hand wash it in cool water with mild soap. Reshape it and lay it flat to dry; avoid the dryer to maintain its structure.
FAQ
Can I use a different yarn?
Yes! You can use any worsted weight yarn; just ensure it has similar weight and structure for the best results.
How do I change colors?
When changing colors, finish the last stitch up to the last pull through, then yarn over with your new color and complete the stitch.
Can I make this organizer bigger?
Absolutely! To increase the size, you can add more rounds in the base section and adjust the length of your pockets accordingly.
Looking for more? Check out our cozy collection of home decor patterns.
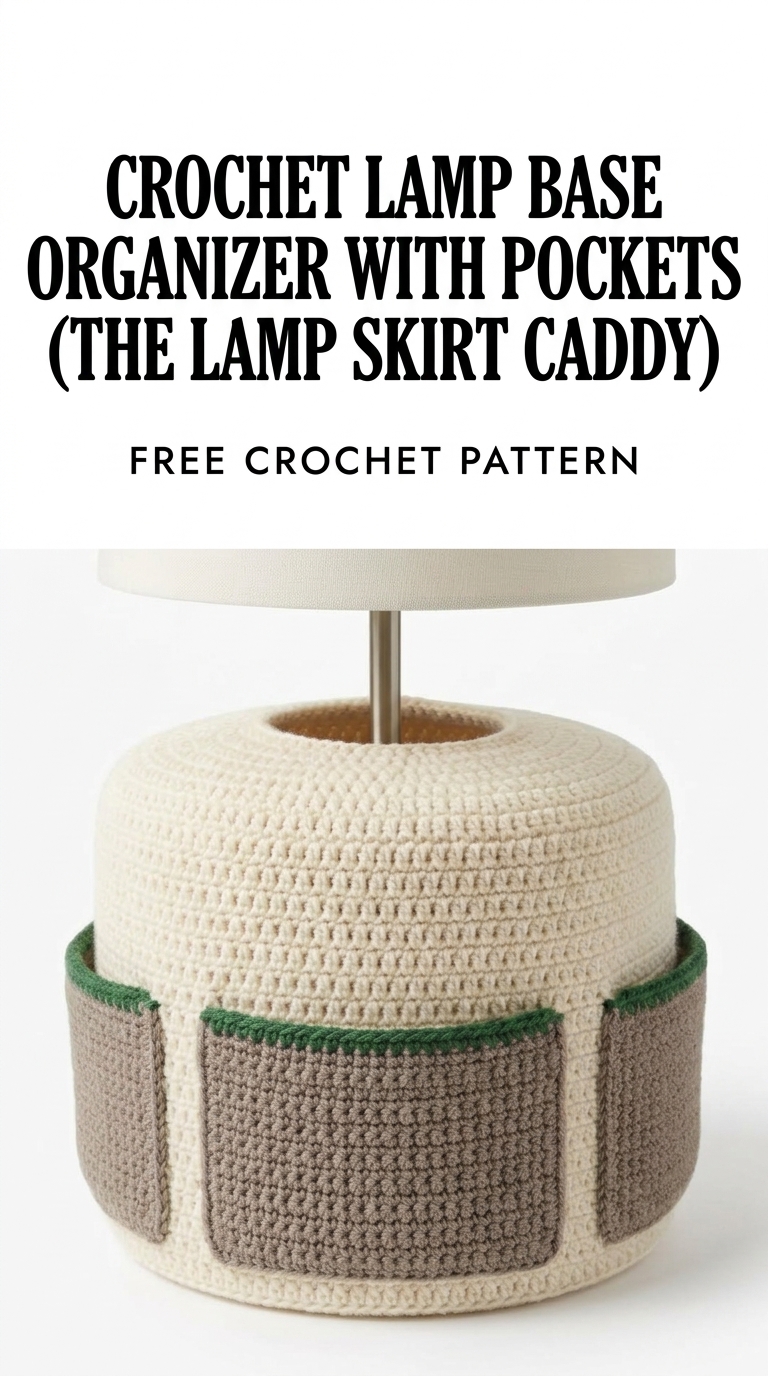
Image shown for inspiration — your finished result may vary slightly.