Crochet Lumbar Pillow With Hot Water Bottle Pocket (The Warm Back) Pattern (Free)
A free, beginner-friendly pattern that clearly guides you through the steps.
Published October 7, 2026 · by Emma
- Skill level
- Intermediate
- Yarn weight
- Worsted (4)
- Hook size
- 5.5 mm (I-9), 6.0 mm (J-10)
- Time
- 6–8 hours
- Gauge
- 14 sc and 10 rows = 4 inches
- Yardage
- about 700 yards
- Sizes
- 12 × 20 inches (30 × 50 cm), 8 × 12 inches (20 × 30 cm)
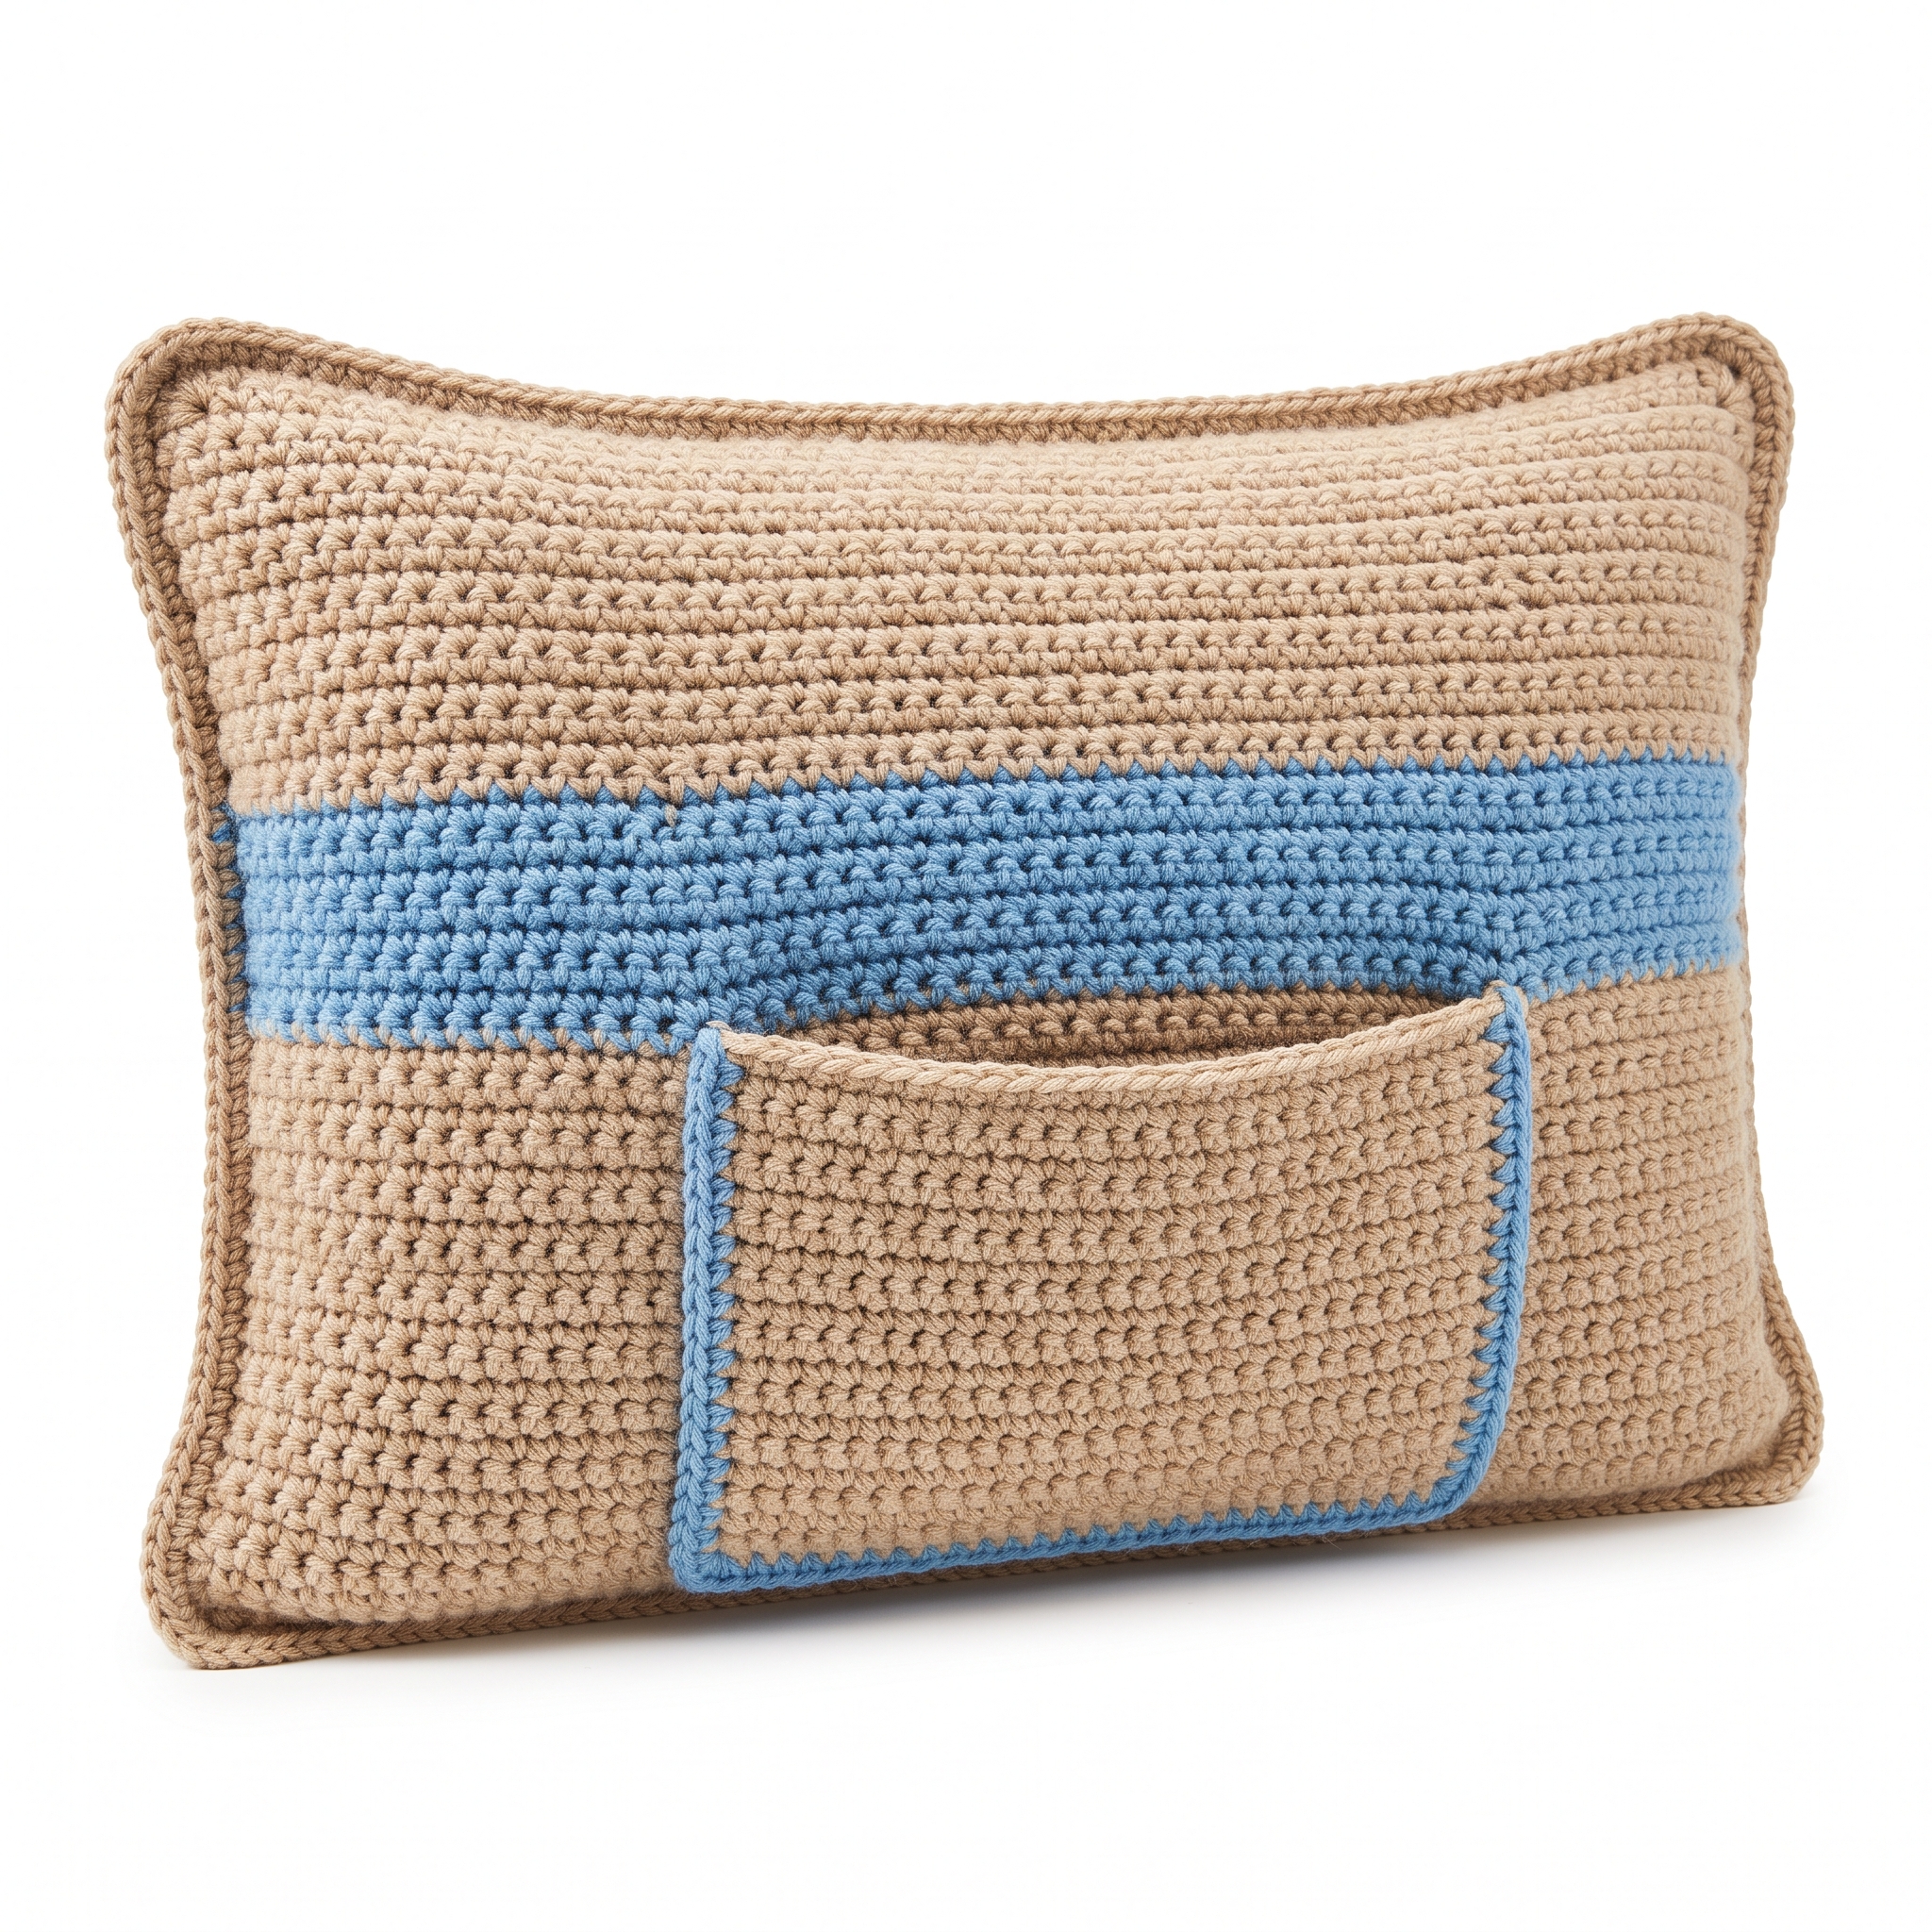
This crochet Lumbar Pillow With Hot Water Bottle Pocket pattern makes a cozy and functional accessory for your home. Perfect for chilly evenings, this pillow combines style and practicality by offering a warm spot for your back while accommodating a hot water bottle. You'll be using basic stitches like single crochet, double crochet, and half double crochet, making it a relaxing project to work on.
This project suits individuals looking to enhance their crochet skills while creating a practical item. You'll gain confidence in color changing and working in rows, adding depth to your crochet repertoire.
Why You'll Love This Lumbar Pillow
- Functional design – this pillow is not just pretty; it's practical, providing warmth and comfort.
- Customizable colors – switch up the yarn colors to match your decor or personal style.
- Great for gift-giving – cozy homemade items are always cherished gifts for friends and family.
- Build your skills – work on increasing, decreasing, and changing colors to enhance your crochet techniques.
Skill Level: Intermediate
Yes! This pattern is suitable for those who have a basic understanding of crochet stitches. You will learn to work with color changes and shaping, boosting your crochet skills as you progress through the project.
Crochet Abbreviations (US Terms)
- ch – chain
- sc – single crochet
- hdc – half double crochet
- dc – double crochet
- sl st – slip stitch
- sts – stitches
- rs – right side
- ws – wrong side
- inc – increase (2 stitches in the same stitch)
- dec – decrease (combine two stitches into one)
Size and Gauge
- Finished dimensions:
- Pillow: 12 inches (30 cm) wide × 20 inches (50 cm) long
- Pocket: 8 inches (20 cm) wide × 12 inches (30 cm) long
- Gauge: 14 sc and 10 rows = 4 inches (10 cm) in single crochet.
To check gauge, make a swatch of 14 stitches wide and 10 rows tall in single crochet. If your gauge does not match, adjust your hook size accordingly.
How to Crochet a Lumbar Pillow (Step by Step)
Step 1: Pillow Body
The body is worked in rows using Color A.
- Foundation Chain: Ch 63 with Color A.
- Row 1: Sc in 2nd ch from hook and in each ch across. Turn. (62 sc)
- Row 2: Ch 1, sc in each st across. Turn. (62 sc)
- Rows 3–30: Repeat Row 2.
- Tip: Change to Color B in Row 15 and use until Row 30 for a stripe effect.
- Final Row: Once you complete Row 30 with Color B, fasten off.
The pillow body should measure approximately 12 inches wide and 20 inches long.
Step 2: Pillow Edging
The edging gives the pillow a polished look.
- With rs facing, reattach Color A at the bottom left corner.
- Ch 1, sc evenly around the entire edge, placing 3 sc in each corner. Join with sl st to the first sc.
- Fasten off.
Step 3: Hot Water Bottle Pocket
The pocket holds your hot water bottle snugly.
- Foundation Chain: Using Color A and 6.0 mm hook, ch 39.
- Row 1: Sc in 2nd ch from hook, sc across. Turn. (38 sc)
- Rows 2–12: Ch 1, sc across for 11 more rows.
- Final Row: Change to Color B in the last row, sc across. Fasten off.
The pocket should measure approximately 8 inches wide and 12 inches long.
Step 4: Pocket Edging
The edging keeps the pocket neat.
- Reattach Color A at the bottom of the pocket.
- Ch 1, sc evenly around the pocket edges, putting 3 sc in each corner. Join with sl st to the first sc. Fasten off.
Assembly & Finishing
- Place the pillow body flat on the rs.
- Position the pocket on the rs, centered along the bottom edge.
- Pin the pocket in place. If desired, sew a zipper at the top of the pocket to secure the hot water bottle.
- Weave in all ends using a tapestry needle.
- Stuff the pillow body with fiberfill to the desired firmness.
- Block the pillow if necessary.
Beginner Tips for a Great Lumbar Pillow
- Use a stitch marker to track your rows, especially when changing colors.
- Count your stitches at the end of each row to maintain consistent width.
- Experiment with different color combinations to find your perfect look.
Common Mistakes (and How to Fix Them)
- My stitches are too tight. This could be because your tension is too tight. Try loosening your grip on the yarn or using a larger hook.
- The shape looks off. This might happen if you forget to count stitches. Always check your counts at the end of each row to ensure correct shaping.
- My colors don’t match up. Ensure you are changing colors properly by completing the last stitch of the row with the new color.
How to Care for Your Lumbar Pillow
Hand wash your pillow in cold water and lay it flat to dry. Avoid ironing to keep its shape intact.
FAQ
Can I use a different yarn?
Yes, you can use any worsted-weight yarn. Just ensure you check the gauge to maintain the correct dimensions.
How do I resize the pillow?
To resize, simply adjust the foundation chain and repeat your stitches accordingly. Keep in mind that the gauge will affect the finished size.
Is it necessary to add a zipper?
No, adding a zipper is optional. You can leave the pocket open or close it using slip stitches for a simpler finish.
Enjoy your cozy lumbar pillow with a handy hot water bottle pocket for that added warmth! Looking for more? Check out our cozy collection of home decor patterns.
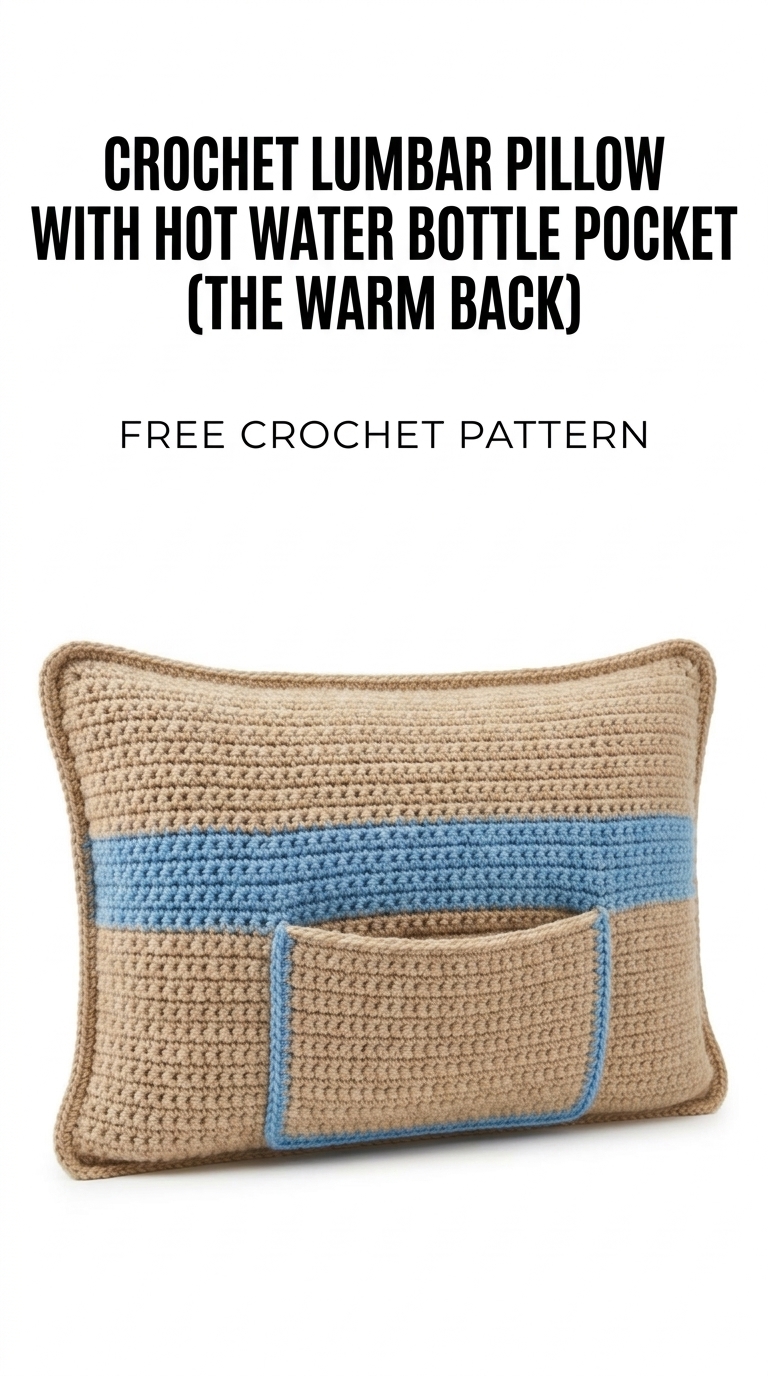
Image shown for inspiration — your finished result may vary slightly.